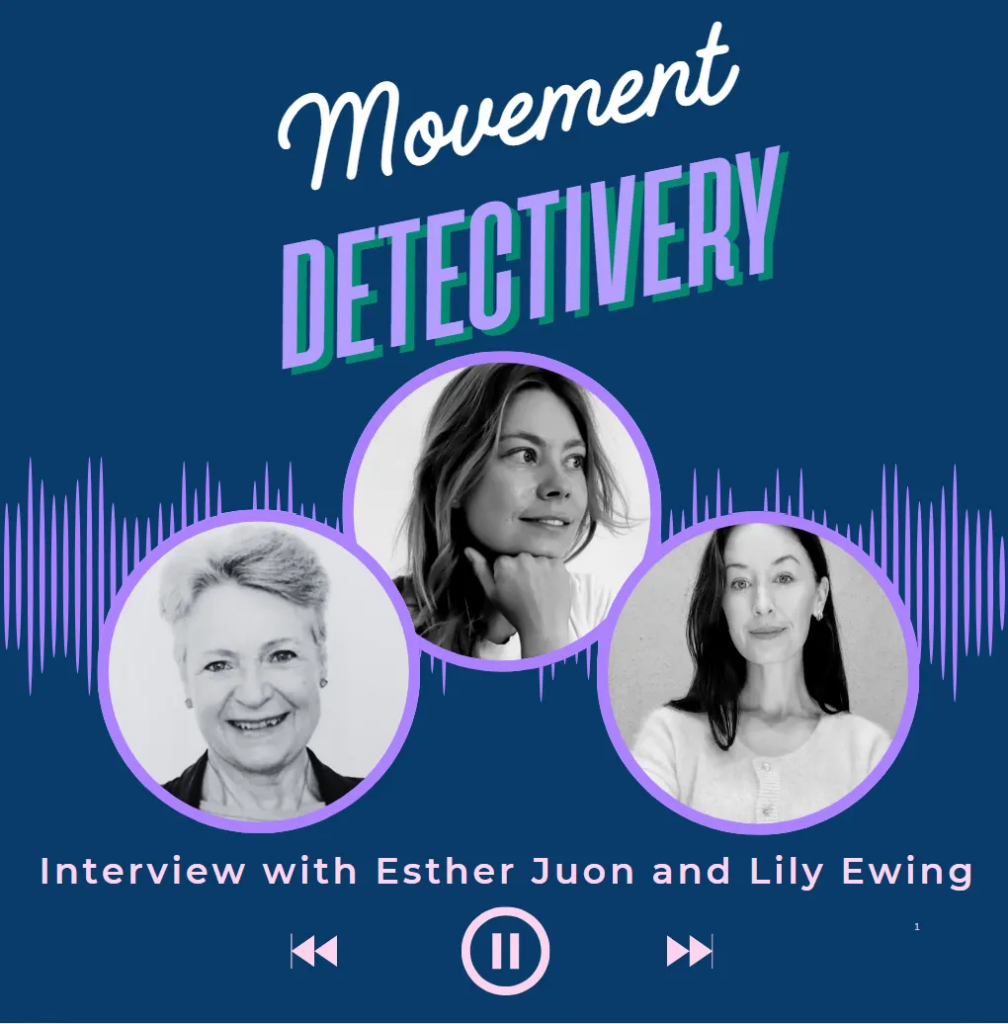
Stuff I Wrote

A Movement-Based Approach to Treating Bunions

Yeah, yeah bunions are a trendy topic and I’m cautiously hopping on the bandwagon to offer A perspective influenced by my training with Anatomy in Motion (fully disclosing my biases as an instructor).

Do I have anything new or groundbreaking to add to the bunion discussion? Nope.

Do I have any revolutionary evidence or new theories to prove the causative mechanism for bunion formation? Nope.

Do I really know anything? Not really.

Wish I knew who to credit this to…

In a perfect world, we’d want to understand what factors led to the bunion(s) forming in the first place… Shit footwear? “Genetics”? Repetitive poor movement of the body above? Previous injury? Probably a little bit of everything.

Regardless of the causal factors, it should be empowering to hear that there are some consistent mechanical findings that often go together with a bunion that you can start to address right away.

First, watch this:

As I describe in the above video, a common mechanical consistency with most buniony feet is that the joints posterior to the 1st MTPJ DO NOT GAP on the medial border of the foot and, instead, the big toe joint is doing allllll of the gapping (abduction). A good strategy would be to start to redistribute the gapping of the medial border across ALL joints, not just the one MTPJ.

I think some people call that load-sharing, a term most commonly used in reference to spine motion and can describe why some people have back pain.

Much like a spine with a hinge point at the thoracolumbar junction, through which all their extension is occurring, a foot with a “hinge point” at the 1st MTPJ, through which all their pronation is occurring can lead to a structural distortion over time that can become stiff and rigid and not super comfortable.

The intention of the exercise I demo in the video is to MINIMIZE the valgus/ABduction/ER/gapping (whatever you want to call it) motion of the big toe, and MAXIMIZE joint opening at the other joints on the medial border of your foot, encouraging healthy pronation mechanics with even joint motion distribution through the entire foot.

And if you understand that as a movement principle, you can get really creative with how you go about working with a bunion, or any part of the body.

What about toe spacers?

In the video, I am using the sock-between-the-toes technique in a way that is reminiscent of a toe spacer. But this is not meant to be a passive solution, like toe spacers often are portrayed as. The goal is use the sock as a tool to re-educate your foot to move differently. Not to hold all the toes apart 24/7 in hopes it will change foot mechanics. Like putting a book under your pillow hoping to learn passively in your sleep… I WISH it worked that way.

I’m sure there is a time and a place for toe spacers as a passive tool, but I’ve personally never recommended people to use them, nor have I ever used them myself (nor have I ever told anyone to STOP wearing toe spacers- Your feet, your choice). Except for a few times I painted my toe-nails…

I find the most repulsive thing about this photo to be the choice of polish colour. Bleh.

Here’s another creative set-up one of my clients came up with to redistribute her big toe’s excessive valgus to her forefoot and rearfoot:

The band is pulling her valgus big toe into ADduction (towards midline of the body), while she pronates her foot to encourage opening of the joints on the medial border of her foot without excessive big toe bunionization (that’s totally a word). The black AiM wedge is promoting inversion of her forefoot to further encourage healthy pronation mechanics.

Want to learn more?

If you are a manual therapy or movement practitioner and you’d like to learn more about foot mechanics in gait, I will be teaching an Anatomy in Motion Module 1 seminar on Sept 22-24 2023. If you are in the Greater Toronto Area, come nerd out!

This was a quick overview, not intended to be specific medical advice. If you are looking for help for your own body, it is important to receive individualized guidance for your body’s unique issues. Get a professional you trust to assess your unique needs, or get in touch if you’d like to work together to find movement-based solutions to help your body move and feel better.

How to Mobilize a Stiff 1st Metatarsal Joint

In the past couple of months I’ve seen several individuals with feet like THIS:

The above left foot is the actual imaging from one of my clients. She had a weird sportsing accident that twisted her foot when she was young and the bone got pulled into this position and no one showed her how to move back into alignment again!

Not to be confused with a bunion… This is an adducted first metatarsal, creating medial compression at the 1st metatarsal/cuneiform joint.

One of my metatarsally challenged clients has has knee pain. Another one has big toe pain. Another one has BOTH knee and big toe pain. And yet another has ankle and hip pain.

But there is hope. All of said clients have found relief by using simple foot self-mobilizations (like the ones I share in the video below) to restore foot function, encouraging the first metatarsal to move back towards the rest of the foot (abduction) and open the compressed space.

Notice the first metatarsal bone is on an angle- The distal end of the bone (closest to the toes) pointing inwards towards the body’s midline (hence adduction**). With the 1st met sitting at this angle, you can see how it closes the space on the medial side of the 1st met/cuneiform joint, compressing the area where the yellow star is.

For reference of “normal”, in the impossibly perfect illustration below, all the metatarsal bones are more or less parallel to each other.

Self-help, self-mob, self-love <3

I made an awkward video to demo two self-mobilization techniques you can get started with if you have an adducted first metatarsal that’s jamming your 1st met/1st cuneiform joint.

Give ‘er a go:

How do feet get like this?

I know with certainty that 3 of my current peeps with this joint alignment have had a traumatic injury to the area (broken bones, sprains, etc), because they told me. But feet can gradually adopt this posture over longer periods of time as an adaptive movement strategy, possibly to compensate for something else like a knee, hip, or even spine with limited movement options/injury history.

And no… Unlike a bunion, I don’t think we can blame poor, tight fitting footwear for this issue 😉

Mobilize, then Integrate

After you’ve mobilized the 1st metatarsal/cuneiform joint, it will be essential to integrate this newly won joint motion in a functional gait pattern to teach the body what to do with it whilst walking normally.

Below is an example of an exercise I did with one client:

The band is tractioning (is that a word?) his 1st metatarsal bone laterally to gap the 1st met/cuneiform joint while he is actively weightbearing into his leg, using AiM wedges to promote healthy pronation mechanics.

In a healthy pronation of the foot, the 1st metatarsal needs to ABduct (away from body’s midline), and the 1st met/cuneiform joint will gap medially (inside of the arch stretches open).

Every time you step forwards onto one foot, a natural gapping of this joint should take place, so you can appreciate how if the 1st met is stuck compressed/ADducted it will NOT be able to open when it should, putting a handbrake on pronation, and potentially a host of other coupled joint movements up the chain like knee flexion, hip flexion, and other things that need to happen when the foot pronates (which is why this one joint not moving can contribute to a multitude of body pains).

Movement-based vs. surgical solutions?

If you’ve received a diagnosis like “arthritis”, and your foot looks like the above photos, and you are getting recommendations for surgery, and you haven’t yet tried a movement-based approach sloooowwww down.

It boggles my mind that the most widely accepted solution for a jammed/adducted 1st metatarsal joint is arthrodesis, i.e. a fusion of the joint. Because the joint isn’t moving… So let’s fuse it so that it moves even… Less…? Arg. I’m sure that there are times when joint fusions are the best solution. But I would encourage folks to at least try a promote-movement-based approach before a stop-movement-based surgical approach. What have you got to lose?

If you are a manual therapy or movement practitioner and you’d like to learn more about foot mechanics in gait and these magical movement-based solutions I speak of, I will be teaching an Anatomy in Motion Module 1 seminar on Sept 22-24 2023. If you are in the Greater Toronto Area, come nerd out!

And if you are looking for help for your own body, it is important to receive individualized guidance for your body’s unique issues. This was a quick overview, not intended to be specific medical advice. Get in touch if you’d like to work together to find movement-based solutions to help your body move and feel better.

**NOTE: Some folks may name this an ABduction of the 1st met, because it is pointing AWAY from midline of the FOOT. I am choosing to use language that uses the midline of the BODY as a reference point.

An Exercise to Liberate Your Stiff Shoulders by Exploring How They Rotate in the Gait Cycle

Do you have stiff, crunchy shoulders from being hunched over a computer? I do. And I don’t even have a desk job… Oh god that would destroy me. I’m wayyy too sensitive.

But sitting isn’t the real villain... A lot of my cranky-shouldered desk-warrior clients tell me it seems impossible to pull themselves away from their work and stretch because they fear not being productive and even feel guilty for taking a break to take care of their bodies. Do you sacrifice body for your work, too?

While I can’t directly help you with the self-care guilt-trip, I’d like to share an exercise with you that can help de-crunchify your shoulders, and you can even do it sitting in your chair. In fact, I did it several times throughout the hour I spent editing the video and writing this blog post, and it helped me to not feel like a complete crumpled mess by the end. 

Check out this 6 minute movement exploration on Arm Spirals: 

Arm Spirals is an exercise is from the Anatomy in Motion repertoire. What makes it so unique and effective is that it emulates how our arms should rotate during arm swing while we walk. 

It also is not JUST a shoulder exercise, but a whole body pattern that brings to life how the upper back and neck need to move in coordination with each other for your arms to swing and rotate with ease in gait. It’s allllllllllll connected, and I explain HOW specifically it all connects in the video.

anatomy in motion

The first minute of the video describes how we’d like to see the arms rotate as we swing them, and the next 5 minutes is a guided movement exploration excerpt from a Liberated Body Workshop I taught in 2021 at Shift Bodywork in Toronto.

But that fear of lost productivity will probably get in your way of actually making time to do exercises like this and putting self-care as a top priority. 

FACT: You can actually only focus on a task for ~50 minutes before your brain say’s “peace out”.

A high-performance coach client I’m working with (on his feet) told me he encourages his own coaching clients to take a 10 minute break every 50 minutes. So that fear of not being productive if you take a break? It’s actually bullshit 😉 Take a 10 minute movement break. Your productivity and your body will thank you. 

What if this exercise hurts to do?

If you have pain during this exercise it is important information. Don’t ignore it.

A healthy human body should be able to move their arms like this without discomfort. Do not push through pain to do the exercise. It might indicate that you could use some specific guidance to restore pain free movement and shoulder range of motion, and I’d recommend seeing a practitioner you trust to get some individualized help. 

My main gig is working with human bodies 1:1 to get to the root of their movement limitations that keep them stuck with pain and poor performance. Get in touch if you’d like to chat about receiving custom tailored guidance on how to un-stick your body with a deliberate movement practice.

I hope you enjoy the freedom and ease in your shoulders, neck, and upper back after exploring this movement with me. Let me know how it goes 🙂

How to Decompress Your Neck and Jaw

Raise your hand if your neck and jaw feel fantastic right now (honestly, mine feels a little like s#!te). I am going to assume your hand is down…

I’d like to share a 9 minute movement exploration to help you find a little more space in your neck, reduce tension and gripping in your jaw, and stand with your head in a better alignment over your body. Instead of like this:

If you’re feelin’ shrimpy, clear a spot on the floor and follow along with me:

I use this exercise with my clients who have limited neck range of motion, compressed (retracted) jaws, jammed occiputs, and even migraines.

Who should do it?

Most humans who stand upright on two feet within Earth’s field of gravity will enjoy this exercise. Particularly if:

  • You have a forward head posture.
  • The muscles at the back of your neck and upper traps feel hard and constricted and tight.
  • Your jaw muscles always feel clenched and sore.
  • You grind your teeth at night.
  • You get muscle tension headaches.
  • You feel like your shoulders are always up to your ears.
  • You’re like me and all of your life stress manifests itself in your neck and jaw.
  • You’re like me and you’re constantly smiling in an attempt to overcome crippling social anxiety.

When to do it?

Anytime! I personally like to do it as part of my morning movement practice and before and/or after I do any deliberate movement/exercise. You might like to use it to break up bouts of sitting so you don’t become a stagnant clump of spineneckjaw (how I feel right now). Or use it to relax anytime you notice tension building up.

I hope you enjoy this little movement exploration and found it useful for helping your neck and jaw (and life) feel more chill.

If anything about this movement feels uncomfortable or bad in your body, don’t force through it. Not everyone needs this exercise. If you have questions, please ask!

Want more help for your neck?

You may enjoy my Movement Deep Dive session: Check Your Neck.

  • Learn how your neck moves in relation to the rest of your body in gait.
  • Self- assess your neck
  • Explore movements that give your neck back it’s missing options for healthy ranges of motion.

And if you’d like more personalized guidance, shoot me an email or a DM on Instagram or Facebook, and we can talk about how to get your body feeling and moving better.

Love your body <3

How I Healed My Chronic Pain with Anatomy in Motion- Interview with Anat Cohen

Ok, I admit, the title isn’t 100% truthful… I didn’t heal my chronic pain with Anatomy in Motion.

Rather, by studying my own body in motion using the AiM Flow Motion Model of gait, I received tools to engage in a life-long journey of optimizing movement, which has led to a gradual (sometimes painstakingly so…) liberating of my body from chronic pain.

Semantics aside, I am delighted to have been invited to speak with Anat Cohen, a yoga teacher and movement researcher in Israel, for her interview series, “How They Healed”. She asked me to share my story about how I got myself out of chronic pain and dance injuries, and specifically how Anatomy in Motion helped me.

Check out the interview here:

I found our conversation to be thoroughly enjoyable. Probably because I got to selfishly ramble on about my life and all sorts of nerdy and esoteric topics that are dear to my heart, like:

– How reframing our relationship with pain as a great teacher is a key part of healing
– How getting stronger is not necessarily going to cure pain
– How discovering and studying Anatomy in Motion was a game changer for understanding how to heal my body
– Why optimizing gait matters
– What my recent experience with foot pain is teaching me about myself in other areas of life beyond the biomechanics
– And why we need not to fear valgus knee and foot pronation

And more 🙂

Much of the work I share online, in my Liberated Body courses, my blogs and videos, on the Gram, are a dissemination of what I’ve experimented with, failed at, and learned from, in my journey of healing my own injuries and chronic symptoms.

My hope is that through my constant bumbling and failing through life, and movement, you may find some small insight into your own process of healing with movement.

Restoring Knee Valgus

You’ve probably heard about knee valgus, aka “knock knees“, i.e knees caving inward towards big toes.

Knee joint deformities in children (leg curvature)
I don’t like the word “normal”…

Valgus refers to the tibia (shin bone) leaning inward towards the big toe. See pic on the far right, above.

If you had my education, the thought of letting your knees go valgus makes you throw up in your mouth a bit. Even the word “valgus” kinda sounds gross, doesn’t it??

Most of us have been indoctrinated with the belief that valgus is bad, and causes knee pain, and you’re not going to biomechanical heaven if your knees go in (because biomechanics are a moral issue, didn’t you know?).

Nothing the god of biomechanics wouldn't let you in heaven for.

While there is truth that valgus knees may not be optimal for an individual, it is not an inherently “bad” movement, and there is a time and place we need it. Like, when our knees bend while we walk (more on that coming up).

But what about someone stuck in knee VARUS?

A knee that pushes out (varus) at the wrong time, place, and magnitude can be just as problematic as a knee that leans in. So this blog post is dedicated to my journey restoring healthy knee valgus into my life.

Why so much focus on preventing knee valgus?

When I was in my early twenties, a young and naiive personal trainer learning about exercise technique, I thought letting your knee go inward was BAD.

I remember consciously walking up stairs pushing my knees out. This made me feel morally superior to all the knee-valgusing, biomechanically not “woke” gym-goers who were obviously going to ruin their knees, and their lives.

Well… I’ve changed my mind about that.

Because I have a right knee stuck with a varus angle that is giving me trouble, and I’ve found some useful movements to *gasp* help it go into valgus.

But first…

What should your knees be doing, ideally, when you walk?

Here’s the ideal mechanical relationship we should see in gait (normal walking) at your knees:

  • Knee bends (flexion) = tibia rotates in towards big toe (goes toward valgus from upright)
  • Knee straightens (extension)= tibia returns back upright (moves toward varus from valgus)

Think of it like a pendulum going from one end of the spectrum to the other: Varus–> center –> valgus –> center–> varus, and on and on and on…

And if you have a minute, behold the fascinating phenomenon of pendulum synchronization


At the risk of going too far down a biomechanical rabbit-hole, if you just want to move and feel better without hurting your brain about it, here’s the kneed to know (see what I did there??):

If your knee bends and goes valgus, but then stays that way when you extend it again, no bueno.

However, a knee that doesn’t get into valgus when you bend it, i.e. stays in varus, is also no beuno.

Below is a video of me walking on June 8th, 2022. Watch my right tibia. Can you see how it stays more varus than my left? That’s the side I have hip, SIJ, and foot issues.

Now, in the spirit of movement detectivery, we ought to assess what actually happens when YOU bend and straighten your knees.

World’s simplest knee assessment

You can easily assess whether your knees are going into varus or valgus with a simple lunge test. Try it out, it will take you 1 min:

So… What did you observe about your lunge assesment?

Does one, or both knees push out over your pinky toe (varus)? Then you might like to show your knees an experience of valgus.

Does one, or both knees collapse wayyy inward, and you feel wobbly, and the outside edge of your foot lifts off the floor? That may be too much valgus, and that’s not the topic of today’s exploration.

In a perfect world, we’re looking to see the tip of your knee cap point in towards yoru big toe, but the tibia remain relatively vertical, not push out, not way in, when you bend your knee.

In fact, the knee tipping inward we want to see ought to be more by virtue of the ribia rotating inwards, like a barber pole, not like the leaning otwer of Pisa falling over.

If you had one or both knees pushing OUT into varus, check out the next three videos. They may help you explore some new, exciting valgusing.

Reclaim your valgus

DISCALIMER: The following three videos show what I’ve personally been working on to intentionally, and gently, give my right knee the experience of valgus again. They may or may not feel right for You. If anything feels unsafe or incorrect for you, please don’t force your body to do these movements.

STEP 1: Gently guide the knee into valgus and flexion, non-weightbearing

STEP 2: Start to weightbear into leg with valgus

STEP 3: Fully weightbearing on a healthy valgus knee

As always, we want to introduce new movement, like knee valgus, respectfully, not forcefuly pushing our knees in at 11/10 intensity. I’m using about 10% total body effort.

Give these assessments and movements a go if it feels right for your body, and let me know what you experience 🙂

I originally posted these videos on my Instagram page. I know… social media is the devil. But I sometimes post things there when I’ve discovered something useful in my biomechanical detectivery that I feel worth sharing, in the chance it may be of some small benefit to you as well 🙂 Find me on IG @monvolkmar

Want to learn more about knees (and your whole body) in gait?

anatomy in motion

If you enjoy my style of biomechanical exploration, I invite you to dive in deeper in my online course Liberated Body.

This is a 4 lesson movement workshop that guides you through how your body moves, and helps you identify and restore the joint motions your body is missing from your gait cycle that could be keeping you from moving, performing and feeling your best.

On day 2 (foot day) we talk more about how the knees should ideally move in harmony with the feet, i.e.- The importance of being able to pronate and supinate well.

Come join Movement Detective School, if you dig it.

Assess if Your Back Issue is Coming From Your Feet (or visa versa): A Guided Movement Investigation

Is your back issue coming from your foot? Or is your foot issue coming from your back? Ain’t no way to know until we assess! This blog post is dedicated to investigating this chicken-or-egg question.

foot pronation
Scroll down a little more to join me in a fantastic biomechanical nerd-out 😉

This blog post is for you if you currently have a stiff spine, stiff foot, long time back issue, old foot injury, all of the above, or are just curious about how to get your body moving more efficiently by learning about the movement relationship between your feet and spine.

You are more than the sum of your parts

I know you know this already, but it cannot be repeated enough: The body is a beautifully connected whole system, and should be considered for the whole that it is, not reduced to individual parts operating in isolation from each other. 

One of my online students (a musician) recently wrote to me about how useful it has been, through doing my sessions regularly, to become more aware of all the various connections between her body parts in motion.

Like understanding that if you can’t move your big toe THIS way, then your hip is going to be restricted going THAT way, and maybe that’s why your left shoulder feels janky. 

Janky: Junk + cranky. Technical term (which I stole from a client of mine, in reference to her janky shoulder). 

I love discovering connections in the body, too. It really lights me up because it always leads to better flowing movement and less pain. This is the magic we tap into in studying Anatomy in Motion: How everything needs to coordinate with everything else for ideal gait.

But its not magic. Its biomechanics.

In the words of my wonderful mentor Gary Ward, creator of Anatomy in Motion: “Look for things that don’t move that give permission for other things to.”

That adds an additional layer of nuance to the stretch and strengthen conversation, doesn’t it??

And on this note, I’d like to share with you a series of video clips from my most recent Movement Deep Dive session: Foot-Spine Connections. 

As the name alludes to, this session’s investigative mission is to learn if there is a discombobulated relationship between the movement of your feet and spine that could be keeping your body stuck moving inefficeintly through each footstep, with discomfort or whatever jankiness you’re aware of in your body.

Understanding this foot-spine connection is extremely useful when we are working on helping our bodies move and feel better with less pain, because it helps us to become aware of how the causative root of a foot issue could be your spine, or visa versa.

This helps us to make better informed choices about what we can focus on in our movement practices, instead of just trying random stuff and hoping for the best.

And so on that note, please enjoy these 4 snippets from the Foot-Jaw Connections Movement Deep Dive. 

I hope you’ll be able to learn a little about how your feet and spine are moving, and how to restore ideal mechanics between the two structures to put more flow in each footstep. 

Foot-Jaw Connections

So, how did stuff go? Did you discover anything new and useful? I’d love to hear how this little bit of movement detectivery went for you. Please write me a comment below if you’d like to share.

Obviously there is more to explore than this… But I hope to inspire you to use this way of thinking in all your movement endeavours. Think outside the box. Think of your body as more than the sum of it’s parts. Just… Think ;).

In the full session, we also explore new ways of moving that connect your feet and spine with each other to restore a more harmonious, flowing relationship. But I can’t share EVERYTHING for free, because this is capitalist America. 

If you’d like to see the full 50ish minute movement deep dive session and participate along, you can find it listed HERE, along with some other faves, for $20 each.


Exercise Obsession: Single Leg Deadlift + Knee Bend

I want to share my current exercise obsession: Single leg deadlift with a knee bend.  

Uncreatively (but aptly) named, the SLDL + knee bend is exactly what it sounds like. You do a single leg deadlift, and you bend your knee.

But before I say more about how and why to do this exercise, check out the video below, and give it a try.

So… Did you try it? That was the complete (7ish min) clip of the demo of this exercise from my Movement and Strength Training Foundations class a few weeks ago.

WHY AM I SO OBSESSED? 

Quick back-story, my foot has been hurtin’ since feb 18th and I haven’t been able to stand and walk comfortably since then (a journey I’ve been documenting on the Instagramz if you fancy a look).

This exercise brought my awareness to some key mechanics that my right hip struggles to perform, and now I’m walking again. Slowly, but walking. Booyah!

Many folks, myself included, struggle to cleanly flex their hips. One main benefit of the SLDL + knee bend is that it helps awaken dem posterior chain muscles (glutes and hamstrings) by systematically accessing your bestest hip flexion, on one leg.

The knee bend add-on is an amazing way to challenge yourself to maintain and deepen your hip flexion, without cheating it by rounding your back. 

All-around great exercise for strengthening and improving your hip and knee flexion, and your awareness of any asymmetries right and left. 

You can totally stop reading now with no FOMO, but, me being me, I couldn’t stop writing here. There’s more!

THE STEP-BY-STEP CUES:

  1. Hinge at your hips from two feet (send your butt back to 6 o’clock). You should feel your hamstrings go on stretch. Slight pelvis anterior tilt (tailbone pointing out like J Lo, no tucking).
  2. Shift your weight all the way onto one leg without losing your hip hinge (tucking under), or twisting your pelvis. 
  3. Reach your other leg behind you. Your toes can stay in contact with the floor for balance, or lift your whole foot off, if you’re feeling dangerous.
  4. Keep spine completely still (don’t round), and bend your standing knee, reaching your hands to the floor. See if you can touch the floor. 
  5. I repeat: DON’T round your spine or tuck under (posterior tilt) your pelvis to touch the floor- All the bending is from your hip and knee joints. Make your leg do the work.
  6. Straighten your standing leg back towards the start position, and stand up on one leg (with grace…)
  7. Repeat, and enjoy the glute and hamstring burn.

As I expressed in the video clip, I didn’t think I would even be able to do this exercise on my right leg. But in the class I was like, “Oh what the heck, let’s try standing on my right foot”. 

And oh man am I ever glad I tried. The rest of the day, my foot felt about 50% better. 

The following day, I was actually able to walk around with minimal pain (in 5x slow motion, mind you, but still… Big success). 

What is the magical power of the SLDL + knee bend? Its not magic… It’s just biomechanics accessed cleanly. But magical things happen when you unlock your missing biomechanics.

SLDL + KNEE BEND KEY MECHANICS 

Ok, here’s the part where I liberate the movement nerd in me. In the SLDL + knee bend, your body needs to be able to:

  1. Flex your hip and anterior tilt your pelvis (the hip hinge part).
  2. Adduct your hip (the get your weight entirely onto one leg part)
  3. Internally rotate your standing hip with a relatively balanced foot tripod (i.e. not rolling all the way to the inside or outside of your foot, or losing your heel contact)
  4. Flex deeper at your hip when you add in the knee bend (differentiating your hip and knee from spinal motion. I think that’s what people call “core stability”?).

The reason I suspect the combination of those three hip motions (flexion, adduction, internal rotation) were so beneficial for my foot is how they contribute to opening the space where the sciatic nerve comes through in the sacral/hip area. 

Look at that big green thing. 

Sciatic nerve in green.

FOOT-HIP CONNECTION VIA SCIATIC NERVE

My working theory is that my foot pain (nervy, burny, tingly, throbby sensation in my heel and sole of foot) is at least in part related to entrapment and/or tension at different parts along the sciatic nerve, as it weaves its way from lumbar spine, through the hip, down to the foot.

Yup, sciatic nerve extends all the way down to your foot, changing names a few times along the way, just like in my Toronto neighbourhood, Rosedale, where street names change randomly part way down the street, making it confusing and annoying to navigate…

For me, one area of entrapment seems to be at my posterior hip joint, i.e. under my butt. 

Here, the sciatic nerve can get easily squished by the hamstrings (biceps femoris) and the piriformis muscle, unless the hip can flex and internally rotate well enough to open up some space and move those muscles. Things my right hip sucks at.

Nerves don’t like when they don’t have space to slide and glide because they are squished by reduced joint spaces and muscles getting in the way.

Using the SLDL + knee bend to access hip flexion and internal rotation in particular seem to help open space for my sciatic nerve to move through, and eccentrically load (lengthen) the muscles surrounding the nerve, so it can slide and glide more freely.

CONCLUSIONS?

You should try this exercise. Just kidding. Do what you want. It’s your life, your body, don’t let me tell you what to do with it.

Disclaimer: I’m not saying that this is THE exercise to fix issues with YOUR sciatic nerve. It’s not. If you suspect you have problems related to your sciatic nerve (or any nerves) you should always be properly assessed by a movement/therapy professional before diagnosing yourself on Google and making up DIY solutions. 

However, for me, the SLDL + knee bend was a big AH-HA moment. Not because it “fixed” me, but as I fumbled with the technique, I was able to observe the differences between my right and left sides. 

And it was illuminating how stark the difference was… (I’m so glad I caught it live on camera).

I’ve been practicing a modified, smaller scale version of this exercise everyday, several times a day, and now, two weeks later, my foot is virtually pain free. Not 100% better, but I’m grateful that I can walk again and stand long enough to wash my dishes. My kitchen was becoming a hazardous area…

Thank you SLDL + knee bend. My butt and hamstrings have new life. And my foot doesn’t feel like a wet rag anymore. 

I’m not old, but as I get older, my attitude towards exercise is changing. Having been sitting on my butt not doing anything exercisey at all for the past 2 months, I’ve had a lot of time to rethink my intention for exercise. 

Yes, strength is important. Challenging our muscles intensely at times is important. But the SLDL + knee bend is not just a strength builder. Done slowly, with awareness, it is also an opportunity to observe and optimize movement mechanics.

In fact, any exercise is an opportunity to observe and optimize. And I think this is a lovely philosophy to apply to any movement practice to make it more meaningful, enjoyable, sustainable, and healthy (read more about that HERE). 

Give the SLDL + knee bend a try. Go slow. Notice if you are doing cheats like me that work-around your hips actually moving cleanly. If it feels bad, or unsafe, don’t do it, and seek help to undestand what’s happening. Let me know how it goes, and if your butt loves you (or hates you) for it 🙂 

FYI, the class in which I showed this exercise was of the April 2022 theme: I Get Knocked Down (But I get Up Again). We spent the month working on exercises with the intention to develop/maintain the ability to move up and down from the floor with ease and grace. Being able to deeply flex the hip and knee are a part of that.

If you enjoyed today’s snippet, and want to try a full M&S class, you can try one for free here: www.monikavolkmar.com/free-class, or get access to all weekly classes and the complete archive of everything I do online HERE, in my monthly membership.

Case Study: How are Spine Side-Bending and Foot Pain Related?

Meet today’s case study: ME.

I’ve had foot pain for the past two months (since Feb 18th to be precise). It’s only in the last two weeks that I’ve been able to stand up and walk around more comfortably. I still have a ways to go for my foot to be 100% better.

Actually, “pain” doesn’t acurately describe how my foot feels. It feels like a wet washcloth that hits the floor in a heap and can’t reorganize its self, but also burns and tingles, with patches of numbness.

CT scans (ugh) and ultrasounds reveal nothing “wrong”, nor do I have visible swelling or tissue damage, so I’ve been exploring the biomechanical aspects of this issue, which my team and I suspect is probably neural inflammation.

The scariest thing about my foot situation was that my standard battery of self-assessments, which I regularly use to check in with my biomechanics, are done STANDING.

Suddenly finding myself in a place where I couldn’t stand up, I felt lost and confused about how to assess WHAT was going on with my body, and WHY I’d gotten this way.

Fast forward to March 16th.

My fellow AiM mentor and anatomy nerd pal, Margy Verba, and I decided to do a live gait and movement assessment case study (aka Nerd Out) with me as the case to be studied. We had 10 movement/therapy practitioners join in to observe and participate. It was great fun. And I learned a lot about my body.

Margy knew I had a foot problem, but I didn’t tell her that I still couldn’t stand up, which completely thwarted her plan to have me do standing assessments. Muwhahaha. But Margy’s a pro, and she modified the whole body assessment to be done seated on a stool.

It was brilliant. She even modified the foot motion and windlass assessments to be done sitting down, which I had never done before, and was impressed by the information I got from it depsite being non-weightbearing.

I’d like to share a short (2ish min) clip from the Nerd Out that blew my mind: The spine lateral flexion assessment.

Check it out:

In this clip she is evaluating my ability to hike one side of my pelvis and create lateral flexion (side bending) of my spine.

Can you see which way I struggle to hike my pelvis? And which direction I can’t flex my spine? (if you said, struggle to laterally flex left, and hike pelvis left, you are correct!)

Here’s what blew my mind: My perception of which way I could side bend more easily was not at all aligned with reality.

I thought I could laterally flex my spine left more easily, but turns out I had just found a way of cheating that movement by shifting my ribcage to the right. Can you see it? ‘Cause I couldn’t feel it until Margy pointed it out.

In fact, I’m kind of embarassed to admit it, but I was under the impression that I needed to work on laterally flexing my spine to the RIGHT! Oops.

Take a look at this photo below (a snapshot of me in the loading, or suspension, phase of gait):

Can you see which way my spine bends? And which way it can’t?

Check out how my spine only laterally flexes to the RIGHT, and never gets left.

Ideally, when we walk, our spine laterally flexes from right to left in the space of one footstep (in less than a second). If we can’t bend equally from right to left, we won’t move as efficiently, and will find alternative strategies to get from one foot to the other. But over time that compensatory strategy may result in things like, oh, I don’t know… Foot pain?

This insight led me to study more deeply the nerves that travel from the lumbar spine and sacrum down into the feet.

Yes, the nerves that keep our feet alive come out of the lumbar spine and sacrum, i.e. the lumbosacral plexus.

Lumbosacral Plexus - an overview | ScienceDirect Topics

Divisions of the femoral nerve, eminating from L2-L4, branch off into the saphenous nerve and plantar nerves, give sensory and motor information to the sole and top of the foot.

Divisions of the sciatic nerve, eminating from L4-S3 branch off into the peroneal nerves, posterior tibial nerves, and calcaneal nerves, whcih give sensory and motor information to the heel and lateral aspect of the foot.

What if the nerves of my right lumbosacral plexus, that go all the way down my leg to innervate my right foot, are being compressed all the time, perpetually smooshed by my inability to get out of a right lateral flexion of my spine?

But me being subjective and blind and thinking I needed MORE right spine lateral flexion, I could have been making the issue worse.

For better or worse, I like to try to figure things out on my own if I can. I’m just glad I asked for help before I continued to jam my spine into a right lateral flexion for a few more months…

This split between perception and reality is completely normal.

When we have pain, we typically experience a loss of proprioception (position sensing). This is why it is so valuable to have a (or a whole team of) support person(s) who can objectively tell you what your body is actually doing, so you don’t make a bigger mess of things, like me.

Getting clear on how my spine was actually moving helped me modify my movement strategies (i.e. stop hurting myself), and things have been steadily improving. It also sparked me to learn more about the lumbosacral plexus and better understand the anatomy involved in my problem.

If we don’t have an awareness of how we are organizing our bodies in movement, we don’t have a chance at understanding how to get ourselves out of the patterns that are keeping us stuck with pain and inefficiencies. Every injury and pain problem is such a wonderful opportunity to learn.

Interested in learning more connections like this? Want help making sense of gait and movement assessments so you can help yourself or your clients/patience with more confidence?

Margy and I plan to do a live Case Study Nerd Out like this every month. Our next one is May 4th, and we’ll be working with a chronic knee issue case (not me this time). If you want to join in, the link to register is HERE.

Are You Trying to Out-Train a Poor Foundation?

Have you heard of the “Leaning Tower of South Padre”?

Leaning South Padre tower turned into 55,000 tons of debris
Ocean Tower. It’s not a happy story.

Officially named Ocean Tower, the unfortunate story of this premium condo building can teach us a lot about having a sustainable movement practice. Like, one that doesn’t lead to self-destruction and cost millions of dollars.

Ocean Tower was supposed to be awesome. 31 stories high. A sweet view of the Gulf of Mexico. Complete with gym, pool, and spa. Each unit would sell for ~$2 million USD. Except for one teenie tniy issue…

The foundation was shite.

In 2008, two years after constructions began, the building started to sink and lean. The whole thing shifted more than a foot. The official explanation was that the parking garage and the tower were mistakenly built connected, forcing the weight down upon the garage instead of on the tower’s core walls. There was also something not quite right with the soil quality.

In 2009, Ocean Tower was demolished because fixing the foundation would have been too costly.  

Many of us are like Ocean Tower.

How’s YOUR foundation?

Hello, I am the Leaning Tower of Monika (by Lake Ontario). Built in 1989 on a shoddy foundation that began to sink and shift significantly enough to require a massive, costly overhaul by 2012.

Fortunately unlike Ocean Tower, I don’t have to abandon the project and self-destruct. I can focus on rebuilding the foundation I never had.

And so can you. And I will argue that this is where most of us don’t spend enough time when we have problems with pain and performance.

What do I mean by foundation?

Check out this quick excerpt from my latest Liberated Body (part 2!) workshop:

Your foundation is made up of the most basic building blocks of movement we humans can do- must be able to do, for higher level activities. The individual joint motions that, when combined correctly, become the raw material for all other movement patterns.

How well-built is your foundation? Are you missing any building blocks?

I had some foundational issues from the start:

  • I didn’t crawl (mom says I just wiggled “like a seal”)
  • I stood up and walked before 12 months
  • I hit my head a few times when I was very young

And those are only the things I KNOW about.

No crawling means my hip joints didn’t get to properly develop. In my infant body’s perception, I had a clump of feet-legs-pelvis-spine that couldn’t differentiate (kind of like Ocean Tower’s garage, mistakenly connected to the building’s core).

Standing up before 12 months isn’t an achievement. I didn’t “beat” the other babies in the standing race. Standing early is like ignoring Ocean Tower’s foundation problem, but saying, “fuck it, we can skip a few steps and get this tower up on time, it’ll probably be ok”.

Wrong.

And interestingly, skipping steps to get things done as fast as possible is kind of how I’ve lived my whole life. But that’s a tangent I won’t go down.

Are you searching for solutions for body problems, but feel like something’s missing? It might be something in your foundation, so basic it’s been overlooked.

Functional movement, strength training, and other modalities to educate our bodies how to “move better” and get out of pain might initially feel good. But for life-long sustainability, we need to know if we are missing any of our fundamental movement building blocks.

We all are. It’s just a matter of which ones.

Your Most Basic Movement Building Blocks

Do you like this drawing I made?

Excellent art by me 🙂 I drew this for my Liberated Body workshop participants last week

The lower two tiers are where I LOVE to play.

The building blocks: Primary motor responses (infant reflexes) and adult joint mechanics (upright gait).

When we get the foundation set right, everything above can fall into place with minimal effort.

Foundation level 1: Primary motor responses in utero

We start building our foundation from the moment we are a wee blob of cells implanted to mom’s uterine wall. Possibly even before that. And we don’t get much say in how this plays out.

In our cozy watery environment, we spend 9 months moving and developing our most basic joint motions. And it’s not random.

These building-blocks of movement are reflexive, pre-installed in our genetic code, and they serve to awaken the higher level “motor programming” needed for us to perform more advanced (but still basic) movements as infants, immediately after we are rudely evacuated into the “real”, air-based, gravity-ruled world.

But things can go wrong in utero.

You can be stuck onto the uterine wall weirdly.

Maybe there was a “kink” in your notochord.

Notochord vacuoles absorb compressive bone growth during zebrafish spine  formation | eLife
Another rabbit-hole…

Mom could have been really stressed, or sick, and it affected you.

Maybe you had a twin and one of you crowded the other, and maybe your right arm didn’t get to move as freely as your beloved sibling’s did because it was smushed against mom’s liver. That jerk. He became a baseball pro, and you failed gym class.

And then perhaps when you made your grand entrance into air-world it didn’t go so smoothly.

Maybe you were flipped upside-down. Your head got stuck under mom’s ribcage. They had to do a C-section. They tried to pull you out by your butt, but your head was reallllly stuck under there. So they had to pull harder and harder. Then you came out with a loud POP as your skull finally was liberated. How stressful! Good thing you can’t remember (imagine that happening to you as an adult…).

The above two stories are actually clients I’ve worked with. But their stories were unconsidered as being relevant to their problems with pain, posture, and performance.

Consider the movements we do in utero as building the first layer of our foundation. We have little control of this, so don’t dwell on it too much.

Just be aware that these foundational movements matter because they prepare us for the next phase: The primary motor responses we develop as infants for the next 3 years of life that helps us to develop our brains and bodies in tandem.

Foundation level 2: Infant reflexes

Between 0-3 years of age we develop the building-blocks for upright biomechanics: Walking. These are our primary, or infant reflexes.

There is a reflex hard-wired in our DNA to help us wiggle and bend and twist our spines to get down the birth canal (assuming we had that luxury).

To unfurl our spine from the comfort of the fetal position (assuming we spent enough time in fetal position in the first place).

To turn our heads, extend our arms and legs, discover we have a right and left side of our bodies.

To turn over on our bellies and learn to extend our spine and head up against gravity. What IS this gravity thing and why is it so damn heavy??

To push and pull with our arms and legs against the floor and develop our wee little hip joints (unless you’re me).

To discover we have this awesome things called a big toe, and we can push it into the floor to propel ourselves forward through space.

These events happen in a stereotypical way based on genetic programming that is similar for all humans.

And eventually we get enough building blocks in place, stacked together in the correct order, to stand up and start to walk.

But not all of us are so lucky, and going back to this level to give back the movements we are missing can be incredibly powerful.

Foundation level three: Upright gait mechanics.

This is where, with gravity, we shape our muscles and bones by standing upright and bearing weight on two ludicrously tiny balancing blobs called feet.

In the gravitational field, we learn to flex and extend, rotate, and side-bend our hips, spine, arms, etc. And its not about strength- Its about discovering how our joints articulate when upright, loaded by our bodyweight, intending to move forward through space.

This is what Gary Ward has been mapping out in his Flow Motion Model and teaching in his Anatomy in Motion courses.

Its not a conscious process. Its more like a discovery of our musculoskeletal system and exploring what it can do.

However, even if we’re missing foundational building blocks, most of us still stand up and walk, and play, and exercise. And then we have accidents, injuries, and do things that distort how we’re able to move. As we age, entrpopy increases, and more building blocks go missing or put in the wrong place.

Where are the gaps in your movement foundation?

Our foundation for all movement is built on unconscious motor programming. And each level contributes to the next. And we shouldn’t skip any steps, but most of us do.

And good thing its an unconsious process. Imagine having to decide for yourself at one year old the “best” way to develop your body to walk? Imagine a one year old with the blueprint for Ocean Tower… Yikes.

You are probably missing a few important building blocks. How do we find which ones are missing and get them back? It will be super specific to your unique experience. This is why I am always hesitatnt to give specific exercises in these blog posts. Get assessed, don’t guess.

But you can consider questions like:

Did you crawl?

Did you stand up before 12 months old?

Did you have an interesting or challenging birth experience? (as the birther, or the birthee)

Did you have a stay in the NICU, pinned down with machines and tubes that kept you alive, but prevented movement?

Did you start a highly skilled movement form before 3 years old? (like all you dancers who started ballet when you were 2, I’m looking at YOU)

Did you have an injury or accident, especially before age 7, but at any age, that caused you to be immobilized, or altered how you moved, for a period of time? Like a broken arm or ankle, head accident, or illness.

Every insult to the body will cause a change somewhere. And if you change one thing, everything else has to change to accommdate that. That’s balance. Its not ideal, but it is “functional”.

We can get our foundation back by re-educating our bodies and moving with awareness, with a little guidance from someone you trust.

Awareness is hard

Knowing what your body can’t do is hard, but cause you don’t know about it yet… If you were already conscious of what you can’t do you probably wouldn’t have any problems.

The more I explore movement, the more I realize that the most value comes from re-visting the basics in more depth. Smaller, softer, subtler, more refined. Not bigger, harder, with more muscular effort and control.

When we move big and effortfully, we only reinforce what we can already do. This is why skipping ahead to strength training when things feel “off” or painful doesn’t solve an issue long term. It will not be sustainable unless your foundation is addressed.

Don’t be Ocean Tower.

Heavy deadlifts didn’t restore my shaky foundation. That only perpetuated my structure to lean and shift, like Ocean Tower, the taller it got, the shiftier it got.

When you can identify what’s missing from your foundation, and give those elements back, all your favourite higher level movements and activities become more natural and effortless, because more of your body is accessible to you.

And then, like me, you might realize that you don’t actually want to powerlift, because that “solution” was a lot of effort and kind of boring anyway. We get to ask the question, “Now that I have a foundation, what do I actually want to do with it?“. Your journey will be your own, and it may not be what you think.

And if any of that resonates with you, and you’re trying to “fix” your basic movement limitations with higher level activities, I encourage you to take a few steps back and see what could be missing from your foundation.

How to start rebuilding your foundation

Curious about what exactly I mean by “building blocks” of movement?

As I already mentioned, this will be a unique journey. You may wish to find a movement/therapy professional to assess and guide you through it.

As a general jumping off point, Gary Ward has created a few excellent online courses that may be of interest to investigate your upright joint mechanics and find what’s missing: Wake Your Body Up, and Wake Your Feet Up.

My workshop, Liberated Body, also helps you identify missing joint motions and coordinations that we need for upright gait (I teach it both online and in-person).

LB Part one is all about the level of gait mechanics: How should our bodies ideally organize for effortless, efficient gait?

LB Part two is a level deeper: How to explore the building blocks that preceeded upright gait- the primary motor responses, and then put those together in a meaningful way for effortless, efficient gait?

Liberated Body is available anytime as a home-study workshop. Part two must be done live, because I customize it to the individuals in the group, and work with you one on one to restore your foundation.

CONCLUSIONS?

Don’t be like Ocean Tower.

Its never too late to build your foundation.

I didn’t get mine right the first time, and exploring my missing building blocks continues to be an enriching part of my daily movement practice, and my life.

Reach out if you have any questions 🙂